Enable Two-Factor Authentication
Cloudhouse-Hosted Only
By default, Cloudhouse Guardian (Guardian) uses a local authentication mechanism for signing in to your Guardian account that is based on an email address and password combination. However, it is possible to manually replace the default mechanism with Two-Factor Authentication (2FA). This method of authentication is especially effective at neutralizing the risk associated with compromised passwords.
Two-Factor Authentication
Guardian supports Two-Factor Authentication (2FA) via Authy, the authentication provider required for 2FA. To enable 2FA for your account in Guardian, the following criteria must be met:
| Criteria | Description |
|---|---|
| Cloudhouse-hosted | - This functionality is only available for Cloudhouse-hosted instances of Guardian. For on-premise deployments, additional work is required to connect to your authentication provider. - For more information on how to enable 2FA for on-premise deployments of Guardian, contact the Cloudhouse Help Desk. |
| Authy account | - An account registered with Authy, the authentication provider. |
| AUTHY_API_KEY enabled | By default, this environment variable is automatically set up during the deployment of Cloudhouse-hosted instances of Guardian. |
Note: If you require any assistance meeting the above criteria, please contact your Guardian Administrator. Alternatively, contact the Cloudhouse Help Desk for additional support.
Enable Two-Factor Authentication
To enable 2FA, access the Guardian User Details page for your account by clicking the user icon on the top right-hand side of the Guardian toolbar. The User Details page for your account is displayed. Here, you can access information relating to your account activity and configurations. Click Enable Two Factor Auth to begin the process of configuring your 2FA settings.
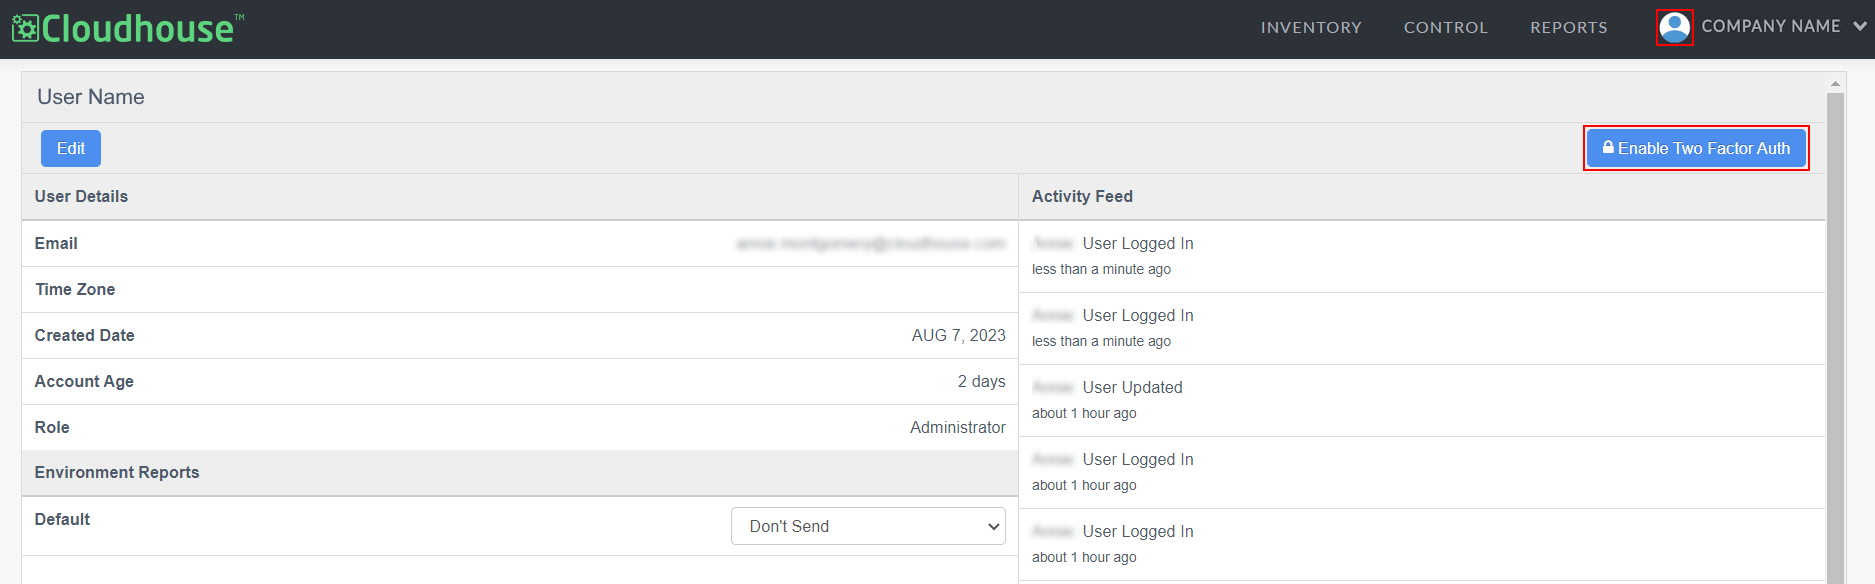
For more information on the content displayed on this page, see .
Enter Your Authy Details
The Enter Your Details Authy dialog is displayed. Here, you are prompted to download the Authy app to your smart phone to receive application tokens required for sign in. Alternatively, you can request application tokens via SMS.
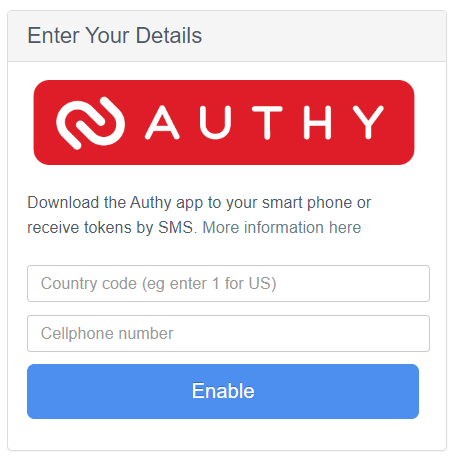
Here, the following fields are displayed:
| Field | Description |
|---|---|
| Country code | - A short alphanumeric identification code for countries and dependant areas. For example, '+44' for UK numbers. |
| Cellphone number | The number of the mobile phone that is being used for 2FA. |
Once you have entered the correct values in each of the fields displayed, click Enable to proceed with configuring 2FA, see below for more information.
Verify Token
The Verify Token Authy dialog is displayed. Here, you are prompted to enter a token in the field provided. The token can be retrieved from the Authy app or via SMS, as described below.
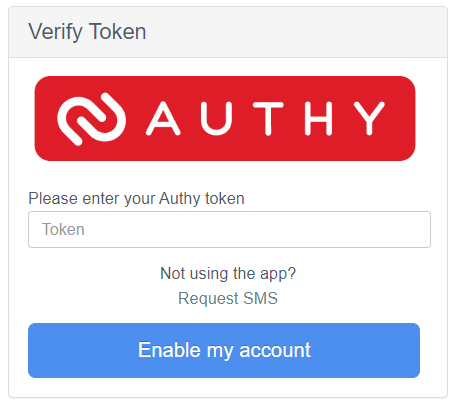
Here, the following options are displayed:
| Option | Description |
|---|---|
| Token field | - The token required to authenticate your account. |
| Request SMS hyperlink | Link to request a token via SMS. |
Once you have entered a token in the field provided, click to Enable my account. This will enable 2FA for your account upon your next sign in attempt, see Sign In via Two-Factor Authentication for more information. For information on how to source the required token, see below.
Token via Authy App
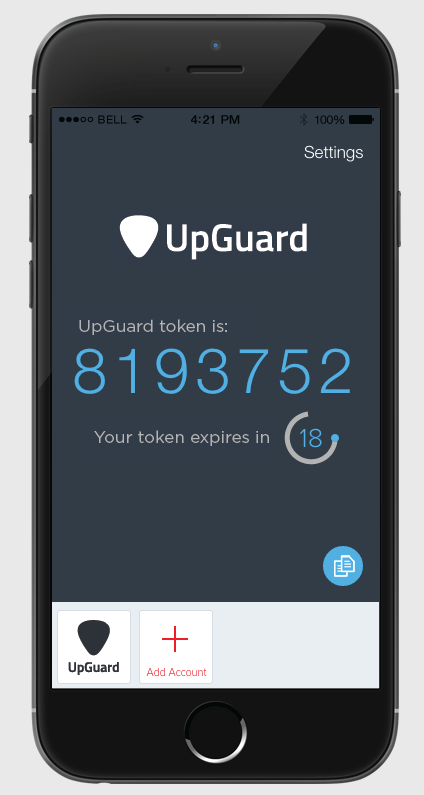
The default method for 2FA is via the Authy app. To source the token required to authenticate your account, open the Authy app and locate your Cloudhouse token (called 'UpGuard token). The token refreshes every 20 seconds, so make sure to enter the value in the Token field and click Enable my account before it is refreshed.
Token via SMS
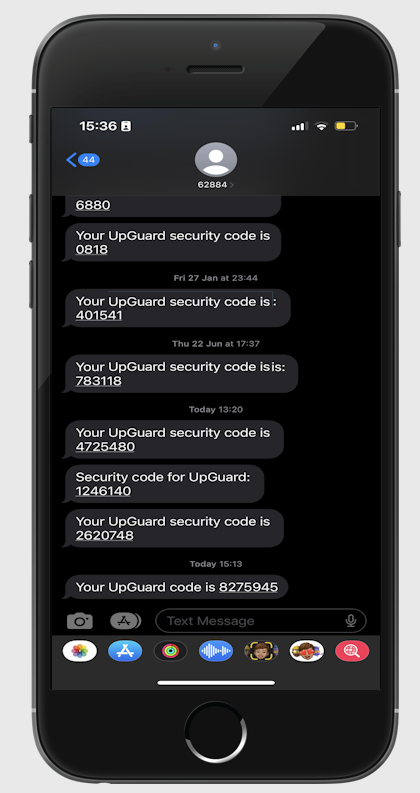
If you do not want to use the Authy app for 2FA, you can Request SMS instead. This will send a text containing the Cloudhouse token (called 'UpGuard security code) to the phone number provided. The token refreshes every 20 seconds, so make sure to enter the value in the Token field and click Enable my account before it is refreshed.
Disable Two-Factor Authentication
To disable 2FA for your account, access the Guardian User Details page for your account by clicking the user icon on the top right-hand side of the Guardian toolbar. The Guardian User Details page for your account is displayed. Click to Disable Two Factor Auth.
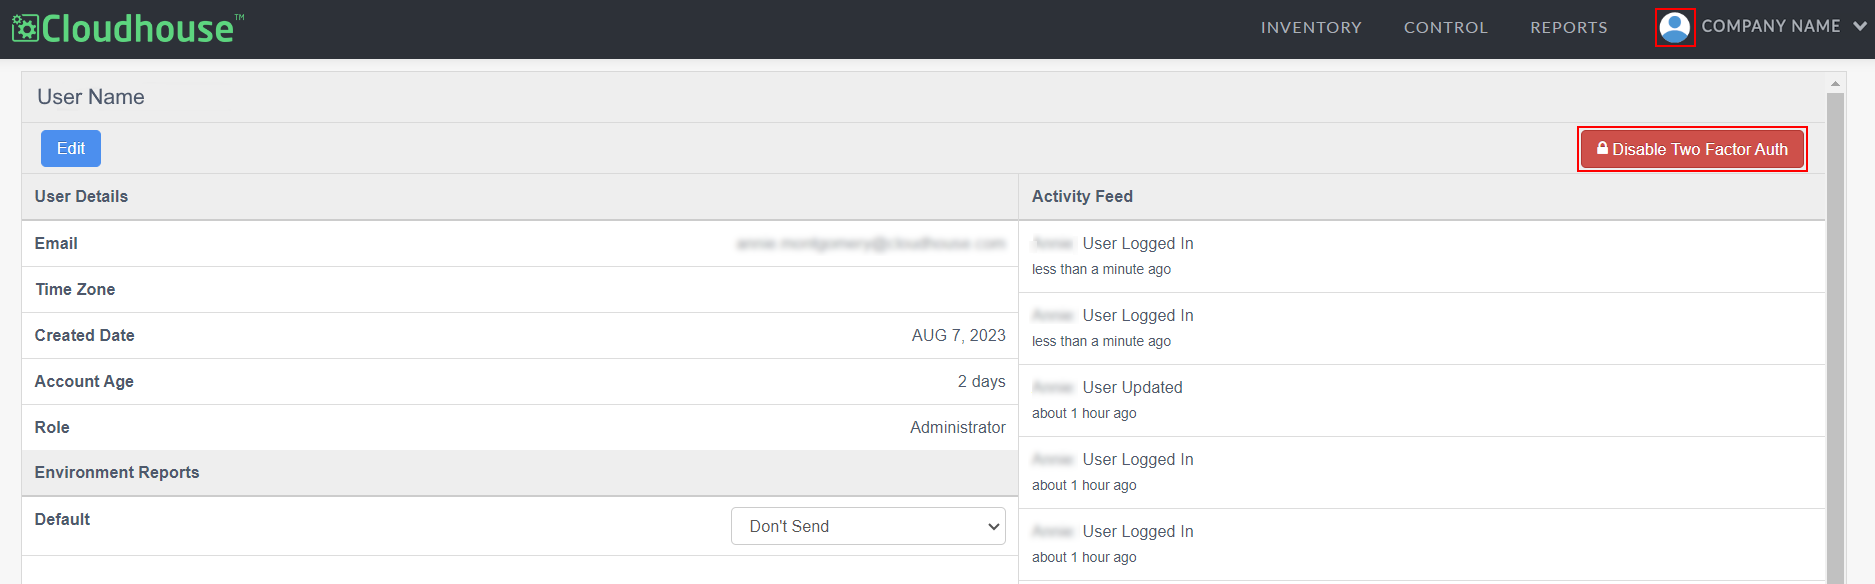
Once your changes have registered in your instance of Guardian, the Enable Two Factor Auth button is redisplayed in lieu.